
Make your own!
Here are a few examples of some designs that I did in class that were done on Photoshop. They are very easy to make.

1. Open or paste an image. Preferably choose one that has at least two contrasting colors.
2. Choose the Text Mask by holding down the “T” tool until the menu slides out.
3. Type the your desired text onto the image. Press ENTER from the Number Keypad, or just click the Move Tool.
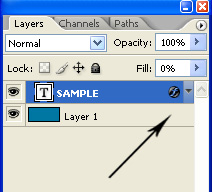
4. Copy. Paste. (A new layer is created automatically.)
5. Use the Move tool to move it to a new position that contrasts with the type.
6. Choose LAYER/Layer Style/Bevel and Emboss. For Style, choose Pillow Emboss.
7. If you only want to keep the filled text, simply remove the original picture layer.

USEFUL TIP: A drop shadow is a good way of off-setting text, especially against a busy background. As a part of this exercise, you will change the shadow to 100% instead of 75%, making it even more pronounced.
1. Create a new file at about 500 X 200 px. Then change the background color.
2. Type a text block and increase the font size.
3. Apply the following style:
- From the Styles palette, click the Options menu and choose "Text Effects".
- Choose "Clear Double Black Stroke"
4. Modify it by double-clicking on the Effects icon on the Layers palette.
5. From the Layer Style dialog box, click on Drop Shadow and change the opacity from 75 to 100. Increase the Distance, Reduce the Size if desired. Finally, if the Drop Shadow doesn't look good, simply remove it.
6. Continue to examine changes that you can make in the dialog box.
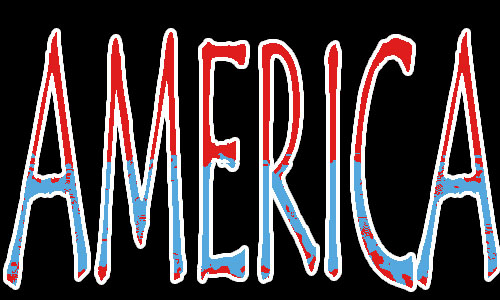
1.Start new file, 500 x 300 pixels.
2.Change the background color to black.
3.Change the font to Red, and type "AMERICA" in large letters, about 110pt.
4.Stretch the text vertically:
* Choose the Move Tool (i.e. the arrow* Click EDIT/Free Transform to stretch the text.
5.Duplicate the layer (right click it on the Layer's palette)
6.Use Text Tool, double click to highlight the text. Color it blue.
7.Rasterize the Blue text
* Click LAYER/Rasterize/Type.* Use the Rectangle Marquee tool, and draw across top half of it.
* Press DELETE.
8.Merge the two layers
* Go to the Layers Palette. Hold Ctrl and click on both America layers.* Choose LAYER/Merge Layers.
* Add a white stroke around letters
o Go to the AMERICA layero Choose EDIT/Stroke. Change color to white, 4 pixels.

* Add a filter
o Choose FILTER/Distort.o Then choose Glass or Ocean Ripple

Note about alternative method: Another option is that when you get to step 7, you can just add a Layer mask to your duplicated text: Use rectangle tool to highlight portion of text. Then click Layer Mask from the Layer Palette.